
Move-Out Cleaning Checklist to Ensure You Get Your Deposit Back
When you move out, the condition you leave the unit in decides how the final conversation with your landlord goes. A greasy oven or grey baseboards are easy reasons for a dispute, and cleaning, not damage, is behind most of them. This move-out cleaning checklist covers what landlords look at, room by room, how to time the work over your last two days, and the spots most tenants miss, so you get your deposit back and leave on good terms.
What Landlords Look For
Most leases ask you to return the unit in the condition you received it, minus normal wear and tear. In practice, the landlord walks through with fresh eyes and notices everything: marks on the walls, soap scum in the shower, grease on the stovetop, crumbs in the drawers. In Ontario, residential landlords usually hold a last month's rent deposit and sometimes a refundable key deposit rather than a damage deposit, but a dirty unit can still lead to a claim for cleaning costs and a poor reference for your next rental. The goal is a unit clean enough that there is nothing to argue about.
Take time-stamped photos of every room once it is clean. If a disagreement comes up later, they are your best evidence.
Room-by-Room Move-Out Cleaning Checklist
Kitchen
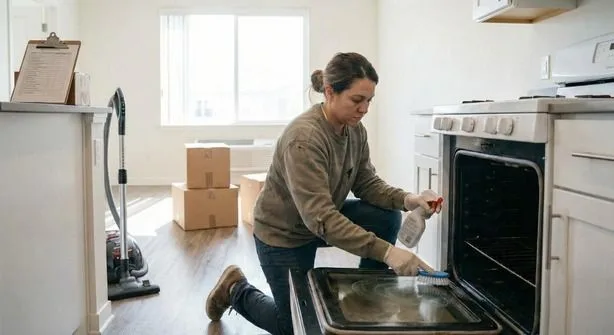
- Inside the oven, the racks and the door glass
- Inside the fridge and freezer, including shelves, drawers and seals
- Stovetop and range hood, degreased, with the hood filter washed
- Inside every cabinet and drawer
- Counters and backsplash
Bathrooms
Clean the toilet inside and out, including behind it and around the base. Scrub the shower and tub, including the grout lines and any limescale on the taps. Clean the sink and vanity inside and out, and finish with the mirrors.
Living room and bedrooms
Wipe the baseboards around the whole room, the light switches and outlet covers, and the window sills and tracks. Vacuum carpets slowly and thoroughly, and spot-clean marks on the walls with a damp cloth or a melamine sponge, testing first on a hidden patch so you do not remove paint.
Often overlooked
Inside closets, including the floor and shelves. Light fixtures and ceiling fan blades. Vent covers and air returns. Behind the fridge and stove. Blinds, every slat.
Timing Your Clean
Do not leave it for moving day. You will be tired, the elevator will be booked, and something will get skipped. Start two days before.
- 48 hours before: clean the kitchen and bathrooms, which take the longest. Do the inside of the appliances now.
- 24 hours before: finish the bedrooms and living room, vacuum and mop every floor, and give the bathroom a final wipe.
- Morning of: take your photos and, if possible, do the walkthrough with the landlord.
The Spots People Miss
Walk through the unit as if you were the landlord. Crouch down to look at the baseboards, look up at the light fixtures, and open every cabinet. Window tracks hold some of the worst grime in any home, so vacuum them first and then wipe with a damp cloth. The floor behind the toilet collects dust and hair, and a cloth wrapped around a ruler reaches it. Light switches have been touched every day for years, and a melamine sponge takes off the grey marks. If the unit has a dishwasher or washing machine, wipe the seals and filter and run an empty cycle.
When to Hire Professionals
If you are short on time, cannot do the physical work, or the unit needs more than a quick clean, hiring a cleaner is worth considering. Moving is stressful enough. Book at least a week ahead, since end-of-month dates in Toronto fill up fast. A small apartment typically takes a few hours. When you book, ask specifically for move-out cleaning, and check that it covers inside the appliances, inside the cabinets and the baseboards. If your lease lists specific cleaning requirements, share them with the cleaner. PureMaids does move-out cleans across Toronto and the GTA with that landlord checklist in mind.
Getting your deposit back comes down to planning and attention to detail, not luck. Whether you do it yourself or hire help, an empty, clean unit and a set of photos put you in the strongest position.